The Department of Agricultural Education
 The University of Arizona
![]()
![]()
![]()
![]()
![]()
|
The Department of Agricultural Education
|
|
STEPS IN GIVING A DEMONSTRATION1. INSTRUCTOR DOES AND TELLS ESSENTIALS OF A DEMONSTRATION DEMONSTRATOR: 1
Is the problem a real job in its natural setting? How to Conduct Demonstrations
1.
Plan demonstrations of the correct length to do the job. DEMONSTRATION
EVALUATION FORM
Date
Student: Title
of: Demonstration: Time
Started:
Time Finished:
Time Used:
Circle
one of the following where applicable: 1.
Setting-
Excellent
Very Good Good
Fair
Poor COMMENTS: PERFORMANCE
SKILL
| |||||||||||||||||||||||||||||||||||||||||||||||||||||||||||||||||||||||||||||||||||||||||||||||||||||||||||||||||||||||||||||||||||||||||||||||
|
Factor |
Desirable
Features |
Point/wt
Factor |
Student
Rating |
Instructor
Rating |
|
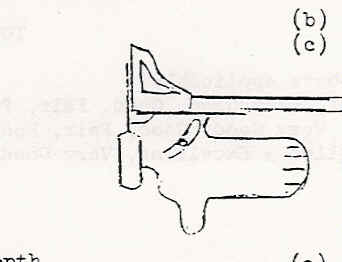
Squareness
(width) |
Straight
cut, .010” |
30 |
|
|
|
Squareness
(length) |
Straight
cut, .010” |
30 |
|
|
|
Consistently
even |
No
gouges or restarts, curved or jagged edges |
20 |
|
|
|
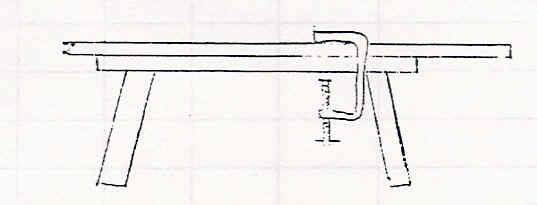
Procedure |
Set
saw for proper depth angle-use safe operating procedures. |
10 |
|
|
|
Use
of time |
Worked
efficiently with few false motions |
10 |
|
|
|
TOTAL |
|
100 |
|
|
Unit:
Construction & Fabrication with Metal
Oxy-acetelyne welding
JOB OPERATION SHEET
Tools
Materials
Welding
outfit
14-16 gage sheet metal
gloves, goggles,
pliers
random size
Reference:
Basic Oxyacetylene Welding
p. 39-42
Steps Key Points
Preparation
| 1. Prepare equipment for operation. | (a) Select tip size and working pressures from equipment chart. (b) Clean tip using proper size tip cleaner. |
| 2. Prepare materials for use. | (a) Wire brush rust or scale from stock. |
| 3. Light and adjust torch | (a) Use neutral flame. |
|
Practice |
|
| 4. Use forehand technique and motion as pictures in following figure.
|
(a) Hold torch as you would a pencil (b) Obtain comfortable position (c) Support torch hand with other hand or rest on thigh of leg (d) If right handed move from right to left--the reverse if left handed (e) Inner cone of flame should be kept 1/16 -1/8" away from molten puddle. (f) As puddle forms, move tip forward by oscillating the torch in a series of overlapping ovals. |
| 5. Secure uniform penetration and width of bead. | (a) Move forward at a speed to control width of bead and sagging of
molten puddle. (b) Oxide scale on underside of bead should be width of bead. (c) Check flame condition constantly and readjust when necessary. (d) Clean tip when shape of inner cone becomes distorted. |
| 6. Lay practice melt beads until control of puddle is achieved. | |
|
Evaluation |
|
| 7. Use laboratory record/score card "Bead w/o filler rod" | |
| return to top | |
Questions or problems regarding this web site should be directed to billye@ag.arizona.edu.
Copyright © 2000 Department of Agricultural Education. All rights reserved.
|